Showing posts with label Bread. Show all posts

Sunday, November 8, 2015

Almost No Knead Bread


You have to make this bread. This week. You will not be completely happy until you do. America's Test Kitchen has done it again, giving such fantastic results. It's so easy the only problem I have is remembering to start the dough the night before to give it its proper amount of rest time. Next time I make it I will make two loaves -it gets eaten too quickly. My four year old tonight at dinner told me, "Mom, every time you make this bread I say, mmmmm breeeaaaaad". He and my two year old love it. I especially love it for breakfast the next morning. We eat this crusty bread at most family get togethers and I have to thank my Mom for trying the recipe first and sharing her results. 
**Here's a helpful hint: I buy one can of beer and measure 1/4 cup amounts into ziploc bags and freeze them. Then, when I make bread I pull out a bag and add the other wet ingredients to the frozen bag to thaw it, then add it all to the flour mixture. I think one large can gave me 20 portions of lager. That's a lot of bread! 

Almost No Knead Bread
America's Test Kitchen

Makes one loaf

Ingredients

3 cups flour
1/4 tsp yeast
1-1.5 tsp salt
3/4 cup plus 2 Tbs water
1/4 cup mild lager, or water
1 Tbs white vinegar 

Directions

In a large bowl, mix together dry ingredients. Add wet ingredients. Be sure to incorporate all flour. Knead a few times to form a ball. Cover bowl with plastic wrap and let dough rise at room temperature 12-18hrs. 
Knead a few times and form into a loaf. Line bowl with a parchment paper and place dough on paper. Cover bowl with plastic wrap and rise at room temperature 1-2 hours. 
With 30-40 minutes left of rising time, place a large oven safe pot with lid on the middle rack in the oven and Preheat oven to 450 degrees. Let the pot sit in there and heat up 30 minutes. 
Turn the oven down to 400 degrees.
Slice 1 or 2 shallow slashes on top of dough with a serrated knife. 
Pick up parchment paper carrying loaf to the preheated pot. Cover with lid and bake 20 minutes. 
Remove lid and bake 20 minutes more. 
Loaf should be beautiful dark golden brown.
Remove from pot, let it cool on a rack. 
Devour.


Monday, September 14, 2015

Chocolate Chip Banana Bread


How many variations of of banana bread can you have? Clearly not enough.  So far we have 3 different kinds on this blog and I'm pretty sure there will be more. But this one, this banana bread is simple, clean, and completely banana. No cinnamon to hide behind and with the occasional hit of chocolate.  I think this banana bread could also be called Bluth banana bread in honor of Arrested Development.  Unless you can cover a whole loaf of banana bread and chocolate.Yum :) And remember, "There's always money in the banana stand."

Chocolate Chip Banana Bread 

Makes 1 8x4 inch loaf

Ingredients 

2 c flour 
1 Tbs baking powder 
1/2 tsp salt
Juice of half a lemon
1/2 c unsalted butter
1 cup sugar 
2 lg eggs
1 1/2 c (~3) mashed over-ripe bananas 
1 Tbs vanilla
1/2 cup chocolate chips

Directions 

Preheat oven to 350 degrees. 
Grease or line an 8x4 inch loaf pan with parchment.
Whisk flour, baking powder, and salt in a medium bowl.
In a stand mixer cream butter and sugar.
Add eggs, vanilla, bananas, and lemon juice and mix well. 
Add flour to butter mixture slowly. 
Stir in chocolate chips. 
Pour batter into prepared pan and bake at 350 for 50min - hour. Insert and remove toothpick to make sure the middle is done and batter isn't pulled out with the toothpick. With this banana bread I check a few times. The top will be golden brown and maybe a little darker than you're used to. 
Allow to cool for 20 min in pan on a cooling rack then remove it from pan and finish cooling on the rack. 

Thursday, January 29, 2015

Orange Cinnamon Banana Bread


I love this banana bread. I've started to learn not to say certain things are my favorite or perfect because I often find something later that I like better, or my taste will change, but this banana bread is at the top of banana breads I've tasted. The top is crispy and the inside is moist like banana bread should be. I even gave mini loaves of this bread to our neighbors for Christmas this year. I have been meaning to try honey in place of the sugar but keep forgetting, so if you try it let me know how it is. 😊

Orange Cinnamon Banana Bread 

Makes 1 8x4 inch loaf

Ingredients 

2 c flour 
1 Tbs baking powder 
1/2 tsp salt
1/2 Tbs cinnamon 
Zest and juice (about 1/3 c) of one orange 
1/2 c unsalted butter
1 cup sugar 
2 lg eggs
1 1/2 c (~3) mashed over-ripe bananas 
1 Tbs vanilla

Directions 

Preheat oven to 350 degrees. 
Grease or line an 8x4 inch loaf pan with parchment.
Whisk flour, baking powder, salt, cinnamon, and zest in a medium bowl.
In a stand mixer cream butter and sugar.
Add eggs, vanilla, bananas and juice and mix well. 
Add flour to butter mixture slowly. 
Pour batter into prepared pan and bake at 350 for 50min - hour. Insert and remove toothpick to make sure the middle is done and batter isn't pulled out with the toothpick. With this banana bread I check a few times. The top will be golden brown and maybe a little darker than you're used to. 
Allow to cool for 20 min in pan on a cooling rack then remove it from pan and finish cooling on the rack. 


Friday, October 17, 2014

Olive Cheese Bread


This is a result of a Dad not coming home for dinner. My husband was out of town and I wanted something cheesy, and bready, salty, and... just plain good. I'm easily making this to take to a party or if there is football game on.  It was goooood. I may or may not have eaten just a few pieces shy of the whole thing. 

The crust is fantastic and was found on Carlsbad Cravings

Olive Cheese Bread 

Makes 2 large pizzas 

Ingredients 

1 tablespoon active dry yeast
1 1/2 cups luke warm water
1 tablespoon sugar
3 1/2 cups flour
1 teaspoon salt
1 tablespoon olive oil plus more for brushing onto dough
1/2 teaspoon garlic powder
1 cup chopped pimento green olives
1 cup cheddar cheese
1 cup mozzarella
dried parsley

Directions

Combine yeast, water, olive oil, sugar, flour and salt into a stand mixer (can do by hand as well) until it forms a smooooth dough ball.  If the dough is too wet and not pulling away from the sides of the bowl, add a tablespoon of flour at a time until it becomes smooth and uniform.  
Place in a bowl and cover to rise until double in size.  about 1-2 hours
Preheat oven to 475 degrees with the pizza stone in the oven.
Punch down the dough and divide into equal balls. Cover with a towel and rise another 15 minutes
Roll out one dough ball into a rectangle on top of a parchment paper.
brush with olive oil, sprinkle with 1/4 teaspoon garlic powder and top with half the cheese and olives then sprinkle with some parsley.
Bake about 12 minutes 
Repeat with second dough ball.  

Yummm

Light Brioche Hamburger Buns


These are some pretty buns.  They taste just as good as they look, if not better.  Like most breads, they are easy to put together but the time it takes for the yeast to do its magic can influence whether you decide to make them. Please, I beg you, think of these for your next burgers and take the time! They freeze well so make a double batch if you eat sandwiches that require buns often. I will forever kick myself if I don't plan ahead and make these.

The recipe was printed in the NY Times from Comme Ca restaurant in LA but I found them, of course, on Pinterest via Parsley Sage and Sweet.

Light Brioche Burger Buns

Makes 8 buns

Ingredients

1 cup luke warm water
3 tablespoons warm milk
2 teaspoons active dry yeast
2 1/2 tablespoons sugar
2 large eggs
3 cups bread flour (I use all-purpose)
1/3 cup all-purpose
1 1/2 teaspoons salt
2 1/2 tablespoons unsalted butter, softened
Black and white sesame seeds and/or poppy seeds (optional)

Directions

In a small bowl combine water, milk, yeast, and sugar. Wait a few minutes to get foamy
Beat one egg and add to water and yeast.
In a large bowl (or stand mixer), combine flours and salt. Squish butter into the flour and salt with your hands, or cut it in using a pastry cutter.  
Stir/mix in the yeast mixture and egg until it forms a smooth, elastic dough ball, about 8-10 minutes
Place in a greased bowl and rise until doubled, 1-2 hours
Line baking sheet with parchment
Divide dough into 8 even balls onto the pan, cover and rise about 1-2 hours. My kitchen was warm and they were big enough after just letting the oven heat up. Although, mine takes a while.
Preheat oven to 400 degrees. 
recipe says to put a pan of water in bottom of the oven, but i didnt and they were great without it :)
brush with egg wash, and sprinkle on poppy seeds.
Bake 15 minutes and transfer them to a cooling rack to cool completely. 

Monday, August 4, 2014

Ciabatta Bread


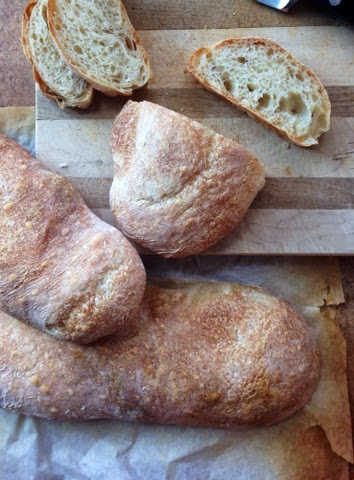
A few years back I searched for a good homemade, artisan like, bread that had a thin crust that my little one could chew. I was trying to make our own bread for a while and I wanted more than just soft sandwich bread. I found this recipe from thefreshloaf.com and it's one of my favorite breads. There are two variations and is suggested to make with bread flour but I've always used the first variation and just all purpose flour. I also weigh my ingredients to make sure it turns out but I have approximations to help if you don't have a scale. When I make this ciabatta bread we go through it pretty quick. Sometimes I double it and freeze all the extra loaves. It's great for sandwiches, and bread at dinner, but I mostly like it toasted with butter and jam. 

Ciabatta Bread

Makes 3, 10 inch loaves

Ingredients

50 g flour (about 3 1/4 cups)
475 g water (2 1/2 cups)
2 teaspoons yeast
15 g salt (3 teaspoons)

Directions

Mix ingredients in a stand mixer. Let sit for 10 min to let the yeast do it's magic. 
Beat the living daylights out of the dough (I use speed 6 on my Kitchen Aide) for 10-30 min. To help it move faster I start with the paddle attachment then move to the dough hook when the dough begins to climb high on the paddle. 
Mix until the dough is only sticking to the bottom of the bowl as you mix.
It will be a sticky, goopy, booger like dough ball. Haha sorry, but it is. 

Place in well oiled large bowl and let rise until it has tripled in size. About 2.5 hours. Check every hour to half hour.

Empty out on a well floured surface. *This can be a difficult dough to work with but it's very doable with well floured hands and quick hand motions. 
Cut into 3 or 4 even sections and shape them into 10 inch oblong loaves on parchment paper. (I basically cut then gently stretch)
Cover with towel and let raise another 45 minutes. I often just let it raise near the preheating oven and put them in when it's heated. My oven is slow :)

Preheat oven to 450 degrees with a pizza stone or upside down cookie sheet on the middle rack. 
Bake in 2 batches if needed. 
Bake 20 minutes 
Let it cool completely 
Enjoy!!! 


Monday, July 21, 2014

Homemade Pretzel Balls


Homemade Pretzel Balls
3 cups warm water
2 1/4 teaspoons (one package) active dry yeast
1 tablespoon sugar
2 teaspoons salt
2 cups bread flour
6 cups all-purpose flour
3 cups water
3 tablespoons baking soda
4 tablespoons melted butter
1 tablespoon coarse grain sea salt
Dissolve the sugar in the warm water. Sprinkle the yeast over the top of the water and allow that to sit and foam up for 5-6 minutes.
In a large bowl, combine the salt, bread flour, and all-purpose flour. Pour the yeast water into the bowl. Stir until combined. Turn out onto a floured surface and knead for 5-6 minutes. This flour is probably more water-based than you might be used to (if you bake bread often), so feel free to really flour your hands or the surface as you work. Place in an oiled bowl, cover, and allow to rise for 1 hour (or until doubled in size).

Fill a large pot with 3 cups water and 3 tablespoons baking soda. Stir to dissolve. Heat the water to a low boil. While the water heats up, on a floured surface, divide the dough into small balls, or roll into long ropes and shape like pretzels. 
Place each pretzel in the boiling water for 30 seconds, flipping halfway through cooking. Use a slotted spoon to remove them from the water, draining away as much water as you can. Place on a baking sheet lined with parchment paper. Allow to rest for 15 minutes.


Brush the tops of the pretzels with melted butter and sprinkle on the sea salt. Bake at 375°F for 20-25 minutes. The pretzels should look golden brown but still feel slightly spring-y to the touch. Dip them in anything, we chose melted garlic butter. So good.

Monday, June 2, 2014

Tortillas


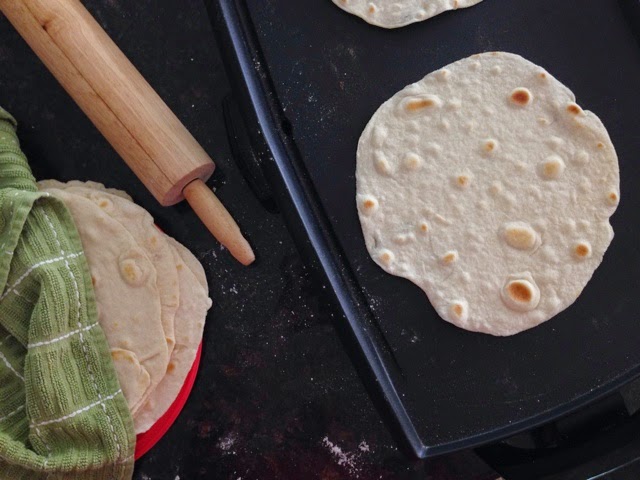
I love my griddle. I received it as a wedding gift from a friend 6 years ago and have used it close to every other week since then, if not more. And I think of her whenever I use it. Thanks Jen :)

I'm taking some enchiladas to a family in our neighborhood tonight and I should not have made these. I want to eat them right now. They might not get dinner tonight ;) 

I found this recipe via Pinterest on Annie's Eats  so go check her blog out. I've tried other tortilla recipes but for some reason they just weren't that good. These are good and easy! I used my food processor but a pastry cutter or even a fork will work to cut the fat into the flour. Today, they probably took me 30 minutes at the most. My 3 year old loved watching the dough spin in the food processor. Then, after I divided the dough, I helped him off to his nap while the dough rested. I then came back to roll out and cook them. Simple :) and so worth it. 

Tortillas adapted from Annie's Eats
Makes 12, 8-9 inch tortillas

Ingredients 

3 cups flour 
2 teaspoons baking powder
1 teaspoon salt
5 Tablespoons unsalted butter (or shortening) 
3/4-1 cup cold water

Directions 

Place flour, baking powder, salt and butter into a food processor and pulse about 5 times (with dough blade and dough button pressed) until it is mixed like sand. 
Turn on the processor and slowly stream in the water. Mix until the dough is in one large ball. If it's too wet add just a tablespoon of flour at a time.
Remove from bowl and divide into 12 equal pieces.
Let it rest covered with a clean kitchen towel for 10 minites.
Heat griddle to 325 degrees or pan to medium heat. 
Roll out dough balls on well flour surface to about a 8-9 inch circle. 
Cook on one side until lots of small bubbles form and flip. Maybe 30 seconds or so.
Finish cooking the other side until it's lightly browned. Maybe 30 seconds to a minute. Not too long or they will be too crispy to fold. Just keep an eye on them and you'll be good to go. 
Put them in a plate and cover with a clean towel. 
They also freeze well. 

Yum

Saturday, May 10, 2014

Roasted Tomato Crostini with Basil Cream Cheese


This is what you call "let's see what we have in the fridge".  A baguette that was meant for another meal, left over tomatoes, feta, and some cream cheese. My 3 year old kept asking for more. He's not really a picky eater so that may not mean much. :) But in all seriousness, it's so easy and good as a simple appetizer or light dinner. It's easy to make the cheese ahead of time so, really, all you have to do is pull the tomatoes out of the oven and top the crostini. Easy. I'd say be liberal with the cheese to help act as a barrier to the tomatoes so it doesn't get the bread soggy... and because it's good. If you aren't serving a crowd, just halve the recipe and just use one baguette, or don't, I guess. 

Roasted Tomato Crostini with Basil Cream Cheese

Makes about 40 crostini (from 2 baguettes)

Ingredients

2 baguettes
3 12 oz containers cherry tomatoes
2 tablespoons olive oil
8 oz cream cheese
4 tablespoons crumbled feta cheese
4 tablespoons chopped basil
Salt and pepper

Directions

Preheat oven to 325 degrees. 
In a 9x13 glass baking dish, coat tomatoes with the olive oil. 
Sprinkle with salt and pepper. Stir and shake the pan to level the tomatoes out.
Roast for about an hour and a half, checking and stirring every half hour.
While the tomatoes are roasting, in a medium bowl combine cream cheese, feta, and basil with a hand mixer until it is smooth, creamy, and thoroughly combined. 
Add salt and pepper to taste. 
Slice bread into 1/2 inch thickness on an angle. 
Generously spread cheese onto slices and spoon about 3 tomatoes on each slice. 

Waffles


I've tried a few different recipes but keep coming back to these. They make a pretty regular appearance at our house. They are the best simple waffle, when you don't want the Belgian variety.  But, I may be a bit biased because it's what I grew up with. I'm not sure where my mom got the recipe. Crisp on the outside and so soft on the inside. 

I did just recently get a new waffle iron that was like 3 years in the making. The decision, that is, as to what kind to purchase, was 3 years in the making. It has a few settings I had to adjust to get the best texture. There are the options for crisp exterior with soft interior, or uniform texture, then a darkness dial. Turns out, setting it to uniform texture with the darkness dial slightly above medium did better than actually just setting it to crisp exterior, soft interior (at least with this recipe). Having options is good. Anyway you need to try these. I like to occasionally double the recipe to have a freezer full. They are just as good toasted from frozen another morning when you don't have time for fresh waffles. And a million times better than eggo waffles. 

Waffles

Makes 10, 7 inch waffles 

Ingredients

2 cups flour
4 teaspoons baking powder
1/2 mounded tablespoon sugar
1/4 teaspoon salt
2 cups milk
2 egg yolks
2 egg whites
1/2 cup melted unsalted butter or oil

Directions

In a medium bowl, whisk together the flour, baking powder, sugar, and salt.
In another medium bowl stir together the milk, egg yolks, and butter.
In a small bowl with a hand mixer, beat or whisk the eggs until they form stiff peaks.
Add the milk mixture to the flour and stir until combined. It's ok if it's a bit lumpy. 
Gently fold the egg whites into the batter until it's evenly distributed with allowing a lot of egg white lumps about the size of quarters or nickles to remain. 
I pour exactly half a cup (which is the same as my ladle) onto my waffle iron. 
If not eating right away, set on a cooling rack to avoid a soggy waffle. 


Wednesday, May 7, 2014

Blueberry Streusel Muffins


One of my favorite things to eat is breakfast. Breakfast for breakfast, or breakfast for dinner, but not lunch, that would be weird. ;) Got it? I got this recipe from my sister-in-law who got it from Martha Stewart. Not her, personally, of course. The best part of these is the streusel. I imagine any muffin with this on top would be good. So don't skimp out on it. 


Blueberry Streusel Muffins adapted from Martha Stewart

12 muffins

Ingredients

1 3/4 cup flour
1 tablespoon baking powder
1 teaspoon cinnamon 
1/4 teaspoon salt
10 tablespoons unsalted butter, melted
2/3 cup milk, room temperature
1 teaspoon vanilla
2/3 cup granulated sugar
1 egg
1 1/4 cup blueberries, or any other small fruit (diced strawberries, apples, pears, etc)

Streusel 

5 tablespoons unsalted butter, melted
2/3 cup flour
2/3 cup powdered sugar
1/4 teaspoon cinnamon 
Pinch of salt

Directions

Preheat oven to 400 degrees. 
Put paper liners in pan. 
Whisk together flour, baking powder, salt and cinnamon in a medium bowl. 
Whisk together milk, vanilla, eggs, sugar and butter. 
Pour wet mixture into the dry and stir until just combined.
Add fruit and gently fold in. Don't over mix. 
Let it rest while you mix together the streusel. 
Stir together the flour, powdered sugar, salt, and cinnamon. 
Add butter and smash to combine with a fork until it's evenly mixed and crumbly. 
Spoon about 1/4 cup batter into muffin tin lined with paper liners. Mostly just make sure they are even. 
Spoon about 2 tablespoon of streusel on top of each muffin and gently press into the batter. 
Bake for 15-17 minutes.
Check with a toothpick just to be sure. 
Cool in pan for 5-10 minutes before removing to a cooling rack. 

Thursday, January 28, 2010

Apple Stuffing


This is a pretty basic stuffing, but with apples. The original recipe comes from Williams-Sonoma cook book American. It calls for dried apples and to be stuffed in a pork chop which is delicious. But, this is for those who only want the stuffing.

I cubed some bread I had and let it dry out in a bowl for a day, stirring it occasionally to let all parts of the bread be exposed to the air.

Apple Stuffing

Ingredients

~4 cups cubbed and dried Bread
2 Tbs Olive Oil
1/3 cup Chopped Shallot, Green Onion, or Yellow Onion
1 chopped Apple
1 tsp Dried Sage or 2 tsp Chopped Fresh Sage
~3/4 cup Chicken Broth
Salt and Pepper

Directions

Heat olive oil over medium heat. Add onions and bread to the pan to saute the onions and toast the bread. Stir every few seconds. If it is sticking, add more oil by the teaspoon.
Turn off the heat and add the apples when the onions and bread are close to done, about 4 minutes.
Add the sage, salt and pepper. Drizzle the chicken broth trying to coat as much bread as possible. Coat until the bread is just wet, not soaked but damp. You may have to add more broth if it looks a little dry.
Transfer to an oven baking dish.
Bake at 375 degrees for about 25 minutes. Stir halfway through to check the stuffing.

Enjoy!

Sunday, December 13, 2009

Mom's Fluffy Cinnamon Rolls


These are the best cinnamon rolls you will ever have the pleasure of putting into your mouth. Nothing beats my mom's recipe. I know everyone loves Cinnabon in the airport and malls but, after you eat one of these, you will never want to waste your money on them again. No offense to Cinnabon of course. They just don't compare! These are soft and fluffy with the perfect amount of cinnamon and sugar. The rolls do take a little bit of time, but it's worth it! Cinnamon rolls have been a part of our family ever since I can remember. This recipe makes about 4 dozen, but they will be gone fast! Freezing the freshly baked rolls helps keep them from going stale and you can warm them up in the microwave for about 10 seconds, yum.

Mom's Cinnamon Rolls

Ingredients

Dough
1 Cube Butter
2 C Milk
2 Tbs Yeast
1/2 Cup Sugar
1 tsp Salt
4 Eggs
~6.5 Cups Flour (no more than 7 cups)

Filling
~ 1 Cube Softened Butter
~ 2 cups Cinnamon Sugar
~ 6 cups Brown Sugar

Frosting
2 lbs Powdered Sugar
1 Cube Butter
A few Tbs milk or add until spreadable
1 tsp Vanilla
1/4 tsp salt if needed
Beat for about 5-10 minutes.

Directions

In your KitchenAid mixer:
Pour hot milk (~2 min in microwave) over 1 cube butter, sugar, and salt. Wait 10-15 minutes or until butter has softened and milk has cooled down. If the milk is too hot it will kill the yeast. Stir in the yeast and wait about 5-10 minutes for the yeast to get foamy.
Using the mixer, add the eggs. Add the flour a little at a time and mix until the dough is smooth. This should take about 1-2 minutes.
Cover with a clean dish towel and let the dough rise until it's double in size. The amount of time this takes can vary depending on the temperature of the room. Check it after 30 minutes, it probably shouldn't take more than an hour.

This is the part of the recipe that is really not exact...
Divide the dough into 4 pieces. Roll out on a floured surface into a rectangle about 10x5 1/2 inches. You just don't want to roll the dough too thin. It should be about 1/2 - 3/4 inch thick. Spread softened butter with a spatula onto the rolled out dough. You can be pretty generous. Make sure it is even. Sprinkle about 1/4 inch thick of brown sugar on top of the butter, keeping it even; again you can be pretty generous. Sprinkle cinnamon sugar on top of the brown sugar, covering all areas.

To roll, take the longer side and fold about and inch in, and push down with your fingers to pinch the dough down. Then roll it up- be sure to pinch the edge on the last roll to seal the roll up and keep it from unrolling. Cut into 12 slices and transfer to a 12x17 inch pan with parchment paper. Roll out, fill, roll up, cut and transfer the next 3 portions of dough. You should end up with 2 dozen on each cookie sheet (12x17 in.) when finished. One dozen can fit on a 9x13 inch pan if needed. Cover the pans with a clean dish towel and let the rolls rise until they double in size. Check after about 30 minutes.
Bake at 400 degrees for about 9 minutes. Let the rolls cool for a few minutes before frosting.
Cover and freeze immediately if saving for more than about 5 hours later; they defrost in the pan on their own in about 1 hour.

Sorry, parts of this recipe are an approximation, but that is what's great about it-you can add as much or as little filling as you like.

Saturday, October 17, 2009

Banana Bread


I don't have anything against banana bread, but I always feel like there is something missing. Don't get me wrong, this was a good recipe; it was a very yummy, moist (I can't stand that word but I could not think of any other word to take it's place), but typical banana bread. I debated whether or not to add spices, chocolate and other exciting ingredients but only went as far as walnuts. I only put nuts in half to accommodate my family's liking. If any of you have suggestions of your favorite banana bread I would love to hear them. I am positive I will be posting more banana bread recipes, each with their own variation, but for now, I think basic is best in order to build up.

*This makes two loaves and was adapted from Simply Recipes

Ingredients
5-6 Very Ripe Bananas Smashed in a bowl
2/3 cups Melted Butter
1 cup Sugar
1 cup Brown Sugar
2 eggs
2 tsp Vanilla
2 tsp Baking Soda
Pinch of Salt
3 cups Flour
1 cup Walnuts (optional, very optional)

Directions

Preheat oven to 350 degrees.
To the smashed bananas add the butter, sugar, eggs, and vanilla- mix well.
Stir in the baking soda, salt, and flour.
Pour into two greased 4x8 loaf pans and bake for 1 hour. Let it cool, and eat (I like it kind of warm still with a tall glass of milk, yum!)

Saturday, October 3, 2009

Perfect Pizza Crust

For some time now I have been craving homemade pizza. Although, I had a problem; I didn't have a recipe for crust. Well, I think I may have found it. :) I have kind of been obsessed with this blog called The Amateur Gourmet. Adam Roberts, the writer, takes a different angle to the whole "blogging world" and I love it. He has some great ideas, like this (haha). Anywho, he posted a friends recipe for some pizza crust that was exactly what I was looking for, sweet, and fluffy. Some leave the crust behind when they eat pizza but I practically save the crust for last, I think it's the best part. In the recipe you can use wheat flour, half wheat half white, or all white. I just used all white flour and it was great.

We topped our pizza with fresh basil, fresh tomatoes, mozzarella, and kalamata olives. We just used whatever pizza sauce that was in the fridge but you could easily make your own (that may have to be a different post).

Perfect Pizza Crust

 For best results, make 2 pizza's from this recipe... otherwise one pizza is too thick and the dough doesn't cook all the way through.

Ingredients

1 Tbs Yeast
1 cup luke-warm tap water
~ 3/4 cup brown sugar
3 1/2 cups Flour
1 tsp Salt
2 Tbs Olive oil
~ 2 tsp Finely Chopped Rosemary (optional but SO good)

Directions

Dissolve the yeast in the cup of warm water with a couple Tbs of Brown sugar, set aside.
In your Kitchen-Aide (with dough hook) mix the flour, sugar, salt and rosemary well.
Add the foamy yeast sugar water to the flour mixture along with the olive oil and mix until it forms one smooth lump on the dough hook. *You can knead it by hand if you don't have a mixer, it just gets kind of messy.
Add a few Tbs of water if needed to make it more sticky (most likely you will need to).
Cover the dough with a cloth or wet paper towel and let it sit and rise for about 2 hours or until it is about double in size.

I cheated because it was late and we were hungry so I put the dough in a warm spot in the house and it was done rising in about 40 min. Keep in mind that if it's too warm it will dry out the dough and won't rise too much so it is always easier to play it safe!

When it's done rising, roll out and top your pizzas and bake at 425 degrees for about 15 min. (If you have a pizza stone, use it)